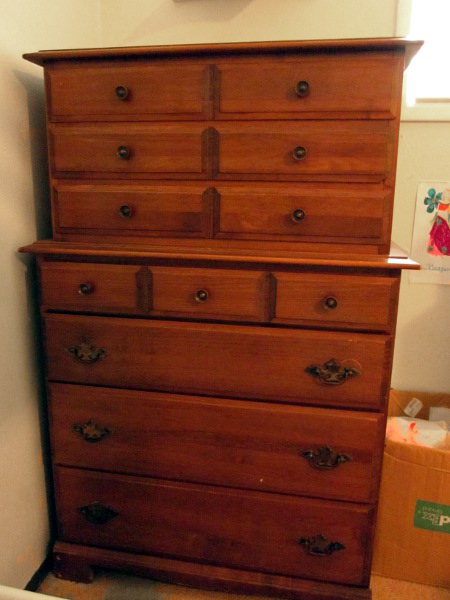
To fully appreciate the project I’m sharing today, you must first see what it’s replacing. Both girls have had their own dresser for years now, and here they are:
Emily’s (a great garage sale find my husband got in CA for just $15–it would probably look great painted, but I just never had the motivation to do it)
Meagan’s (we bought this dresser from Target when we got married 9 years ago and she covered it with all kinds of stickers from preschool) And yes, it’s been in their closet.

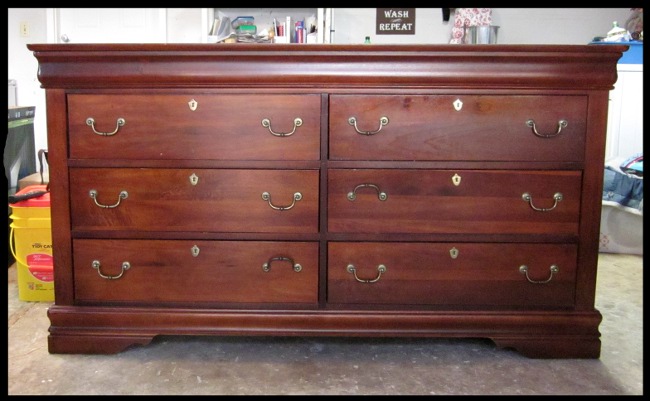
Then I got this great dresser and mirror a couple of months ago for free from a friend at church and have been working hard on transforming it.
I followed the furniture painting instructions from Young House Love. I got oil based primer from Sherwin Williams and then bought regular paint from Home Depot. The white color is Billowy Clouds (I bought 1 quart) and the pink for the top is Orchid Rose (I bought the sample size)
The sanding took a while, even with a palm sander and my husband’s help. To get all the curved parts I wrapped a piece of sand paper around a washcloth.
I primed and then it took about 3 coats of paint to get it all covered nicely. The scariest part was pulling the sander back out again and scuffing up the edges! I had some black stain in the garage from a previous project, so I rubbed a little over the sanded edges and wiped it off again very quickly so it wouldn’t stay on the paint, and I’m really happy with how it turned out. I did the same thing with the mirror.
For stenciling the top, I cut section after section after section out of contact paper (using Make the Cut and my Cougar cutter) and stuck them down on the dresser. This was not easy, but I was set on using my own supplies I had on hand without purchasing a professional stencil from somewhere. When a large section of stencils was down, I painted over everything with the pink paint.
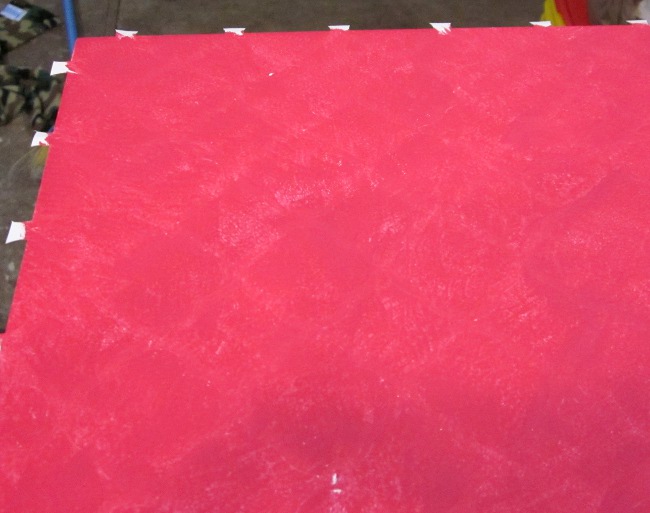
When I got about halfway across the top, the design had started getting distorted (contact paper is flimsy you know) and the shapes weren’t lining up anymore. So, I did what any {crazy} person would do–I traced out the rest of the design using a pencil and used a small brush to hand paint all of those little shapes! It took for-ev-er.
Anyway, by this time I had decided that I would be distressing the top of the dresser as well, and that did a great job of hiding any little imperfections from paint bleeding under, or shapes not lining up perfectly.
Before sanding
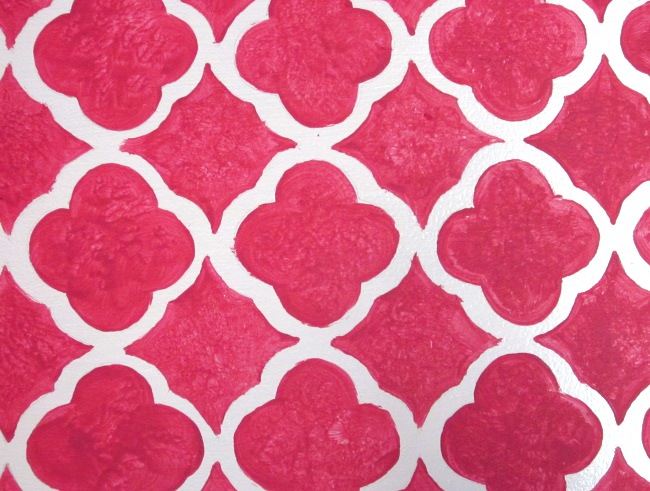
After sanding
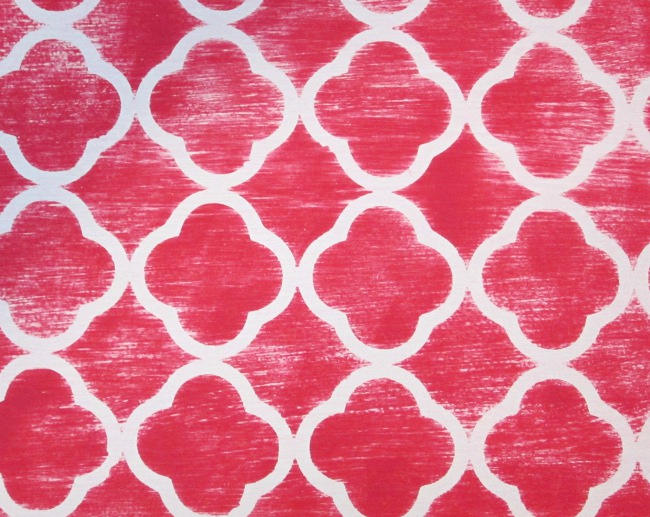
I then did 2 coats of clear polyurethane on just the top. It actually had a teeny bit of a yellow tint to it–not noticeable over the bright pink really. But I have since read that polyurethane can do that, and that a polycrylic would be better? I’ll have to do some research on that next time around. Still, it sure is shiny!
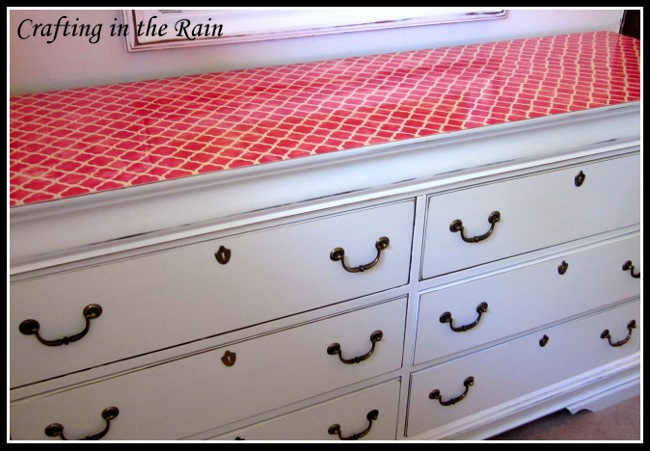
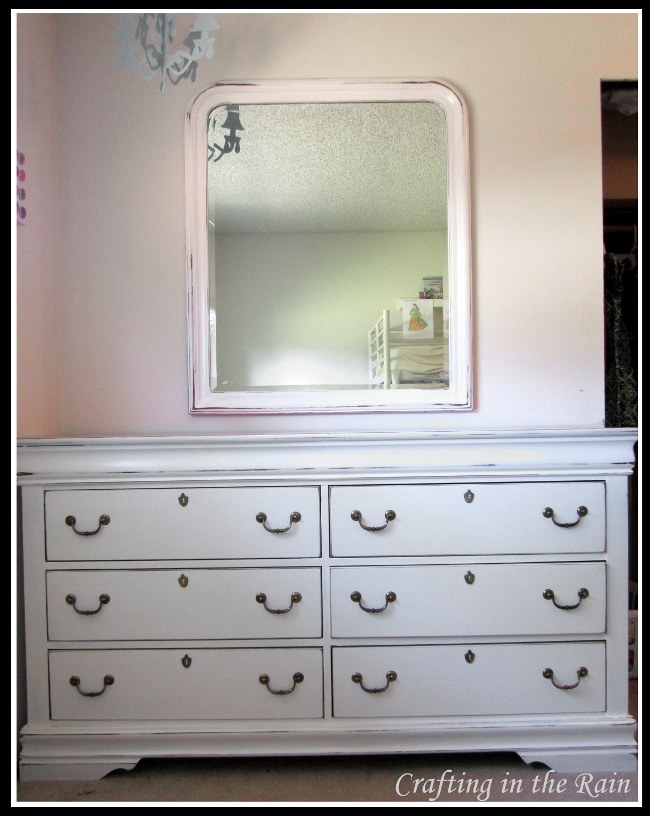
Here it is all set up in the girls’ room.

And if you’re interested, I have previously posted about the blue chandelier and the pink marble wall art (it looks so lonely on that wall still, I need to hang some other things around it!)
So, was all the crazy, never-ending stenciling worth it? What project have you refused to give up on? I’d love to see/ hear about it!

![]()
![]()