Carrot Treat Boxes tutorial updated: March 2022
When I originally created these cute boxes, I hadn’t really gotten into SVG making yet – you’ll see I talk about using the program Make the Cut, and also making a hand cut template.
But after years of working with my Cricut now, and learning Illustrator both for my degree, and on my own, I have a much better file to share with you!
Two boxes easily fit on a 12×12 paper or 8.5×11 paper even.
Fill out this form to the the Carrot Treat Box SVG emailed to you.
When you upload the SVG into Design Space, take a look at the layers panel. You will see two layers – the orange shape, and the lines. By default, the lines are brought in as cut lines – you’ll need to change this in Design Space or your box will get all cut up, instead of folded.
Click on the layer with the lines and then in the toolbar, change from Cut line to Score. Then you will need to select the line layer and the orange layer and click Attach. This way the lines will score on top of the cut shape in exactly the right place.
So much easier to fold this way than with the score board I used originally!
OLD TUTORIAL:
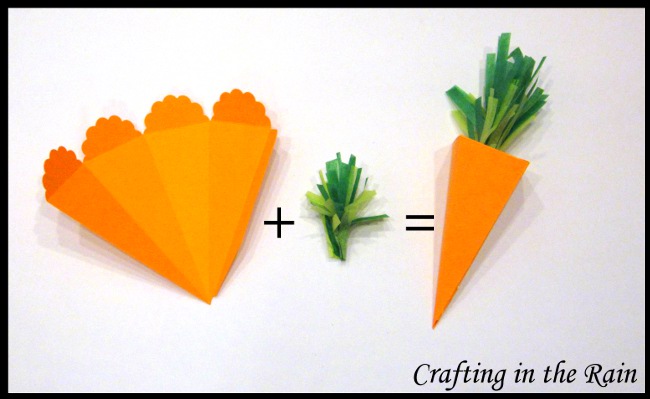
These cute little carrot favors will be set out on each of our plates for Easter dinner next weekend. I created the box file in Make the Cut (and cut it with my Cougar) so I’ll provide that file at the end, but I have also made up a template that you can just print onto orange paper and hand cut.
Score the fold lines on the box (I used my Martha Stewart score board and it worked great) and glue the tab to the inside of the box side.
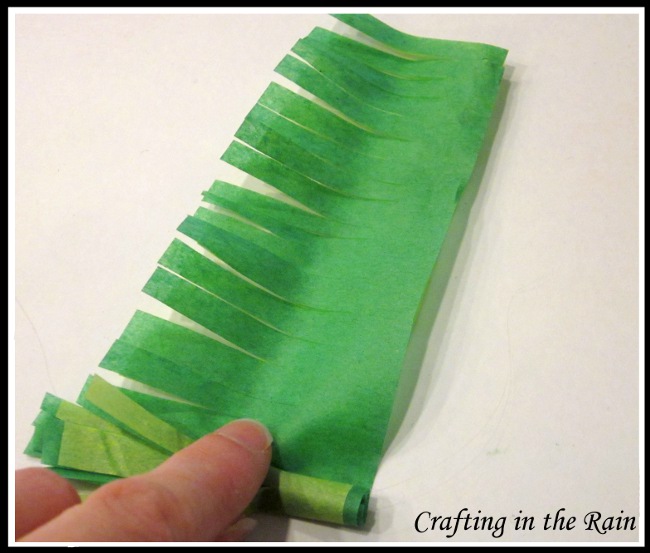
For the carrot top you’ll make a tissue paper fringe. I used two colors of green–you can use whatever you have. I cut two pieces of tissue that were angled. It’s about 6 inches wide and about 2 1/2 inches high on one side and only about 1 1/2 inches high on the other.
You don’t have to be exact of course, but you want one end taller than the other. Dab a little glue along the bottom edge so they’re stuck together. Once the glue dries, cut thin strips with the scissors, but not all the way down to the end. Starting with the tall end, roll up the fringed paper pretty tightly, then glue when you reach the end to secure it. Fluff out the fringes a little and there’s your top.
You could also use green crepe paper if that’s easier for you to come by!
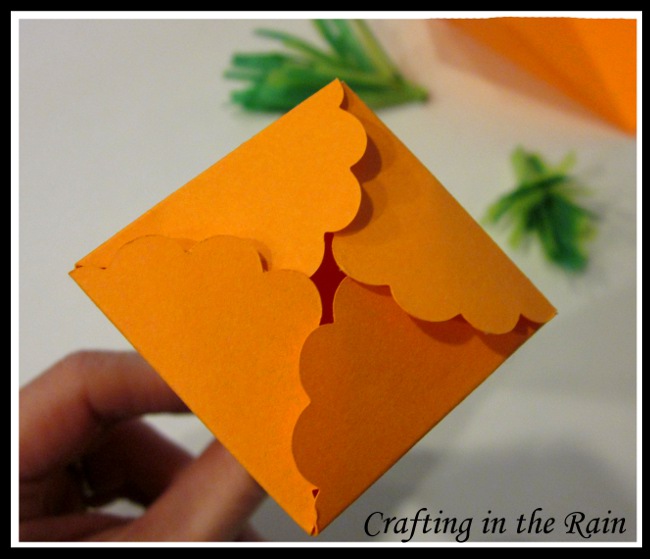
Fill your box with jelly beans or other small treats and fold down the scallops, overlapping all the way around.
Then take the “stem” of your green top and push it down into the center hole. It should stay even without any glue, but a little hot glue on the end would be a good idea if they’re being transported.

Just pull on the tissue paper when you’re ready to eat the goodies and it will pop right open.
*and as a side note, these would be great for all kinds of “punny” situations:
“If you CARROT all, you’ll…
–be my Valentine”
–go to Prom with me”
–attend our training meeting”
–tell all your friends about my cool blog”
you know, whatever 🙂
Happy Easter!
Printable template
Suzi
Wednesday 6th of March 2024
Would love the svg file for this but no matter how many times the link never shows up in my inbox.