I recently participated in Brassy Apple’s Summer of Skills. I actually got to meet Megan at SNAP, so it was extra fun to post on her blog. I showed how to make backpacks from towels.

These bags will hold activities, books, and treats for them while we’re driving to California this summer, and then they can carry their own snacks and water while we’re traipsing around Disneyland.
Materials
Kitchen towels (1 for each backpack…$1.25 at Craft Warehouse…make sure it’s kind of sturdy, don’t use flour sack towels for this)
Thin cording or thin ribbon 2 pieces for each bag (I used 1/8 inch ribbon) Each needs to be twice the width of your bag plus 14 inches.
Fabric paint or fabric medium to add to acrylic paint
Freezer paper for stenciling
Step 1: Fold towel in half (hamburger way…top to bottom 🙂 with right sides together and sew up each side, stopping about 2 inches from the top…back stitch.
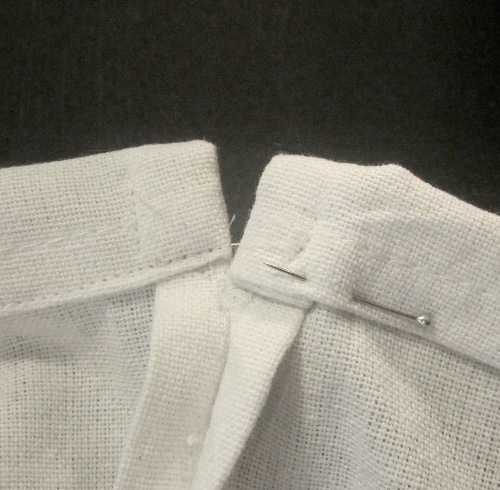
Step 2: Where you stopped sewing, fold each side back and sew it down on itself. Fold the top down about half an inch, so it meets up with where you stopped the side seam.
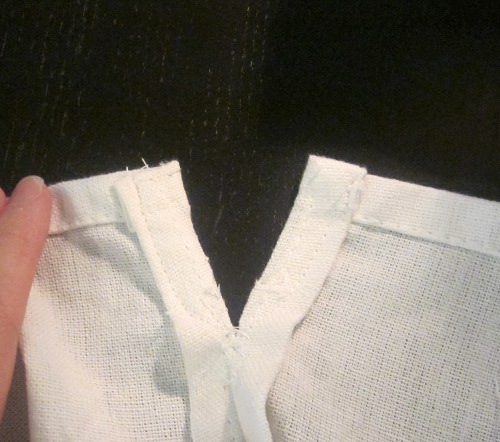
Pin and sew close to the edge. (This is your casing for the ribbon) Turn bag right side out.
Step 3: Measure how much ribbon you’ll need–Twice the width of the top of the bag plus 14 inches. My bag was 16.5 inches wide (so 16.5 x 2 =33 + 14 =47)
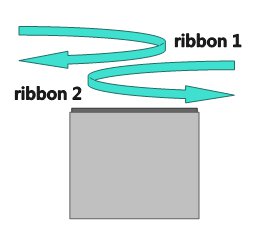
Pin a safety pin to the end of your ribbon and start feeding it through the casing–One piece will go clockwise through the front and back, the other piece will go counter-clockwise. You’ll end up with the two ends of one piece coming out one side, and the two ends of the other piece coming out the other side, like this.
Step 4: Attach ribbon to the side of the bag by unpicking a small part of the seam about 6.5 inches down from the top and sticking the ribbon ends in. Sew them in securely (stitch over the section a few times) This will also close up the hole you just made. Do this on both sides of the bag. When you pull on the ribbons to close the bag, you now have the shoulder straps to wear it as a backpack.

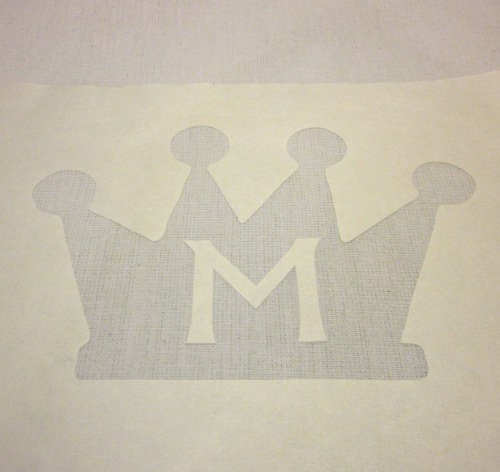
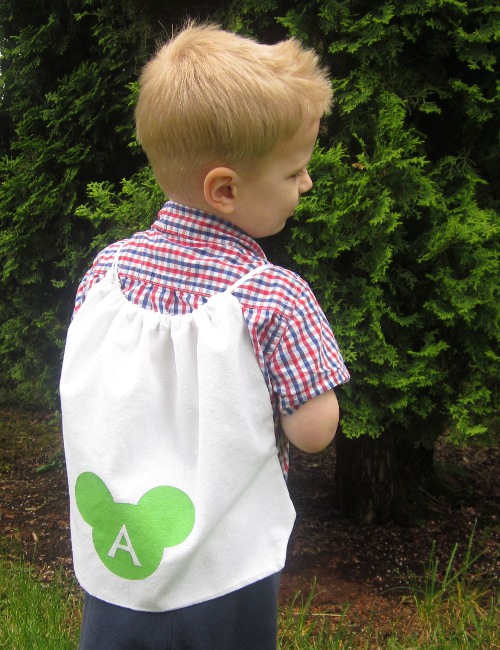
Step 5: Add stencil if you’re doing one (if not, your bag is done–pull on those strings and feel quite satisfied that it works to cinch up the bag!) I cut my stencils with my digital cutter. You could also cut one using scissors or an exacto knife. Make sure you design your image with the shiny side of the freezer paper down. With a medium hot dry iron, press the stencil down on your bag. Put a piece of wax paper inside your bag so the paint doesn’t bleed through to the back.
I bought some DecoArt fabric medium so I could use paint colors I already had at home. Mix 2 parts paint with 1 part medium. Paint the fabric inside the stencil using an up and down motion so you don’t accidentally force any paint under the stencil. I’m always impatient and hurry the drying with a hair dryer. Peel off the freezer paper and admire your work!

I let each of my kids choose their shape and color they wanted, and they’re so excited to get to use them this summer.
Do you have a trip to Disneyland coming up and you’d like a way to get discounted Disneyland tickets? Or check out their many other vacation packages!

Visit Get Away Today and use the promocode: CITR to get $10 off any 2-night or longer Southern California package (hotel and 2 ticket minimum).