So blogging is kind of a funny thing. It can take regular (and sometimes very normally shy and reserved people) and turn them into “Look-at-Me’s” who will post everything from what they ate for breakfast to how they decorated their bedroom or the inside of their fridge to the inside of their head.
It will even get some of them to dress up in wacky 80’s gear for a prom-themed party. I, in fact, will be wearing a dress I pieced together with pink and orange taffeta from the thrift store exactly 1 week from today at such a party 🙂 And I can’t wait.
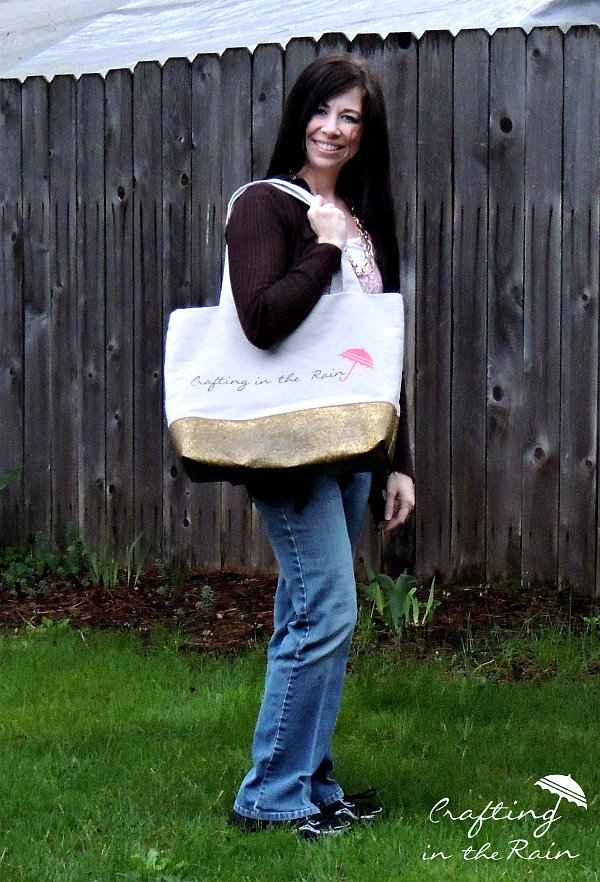
Along with this same theme, I decided to make myself a bag to take to SNAP that has my own blog title on it. That way everyone will know who I am. Or at least my bag can be returned to me when I lose it or something.
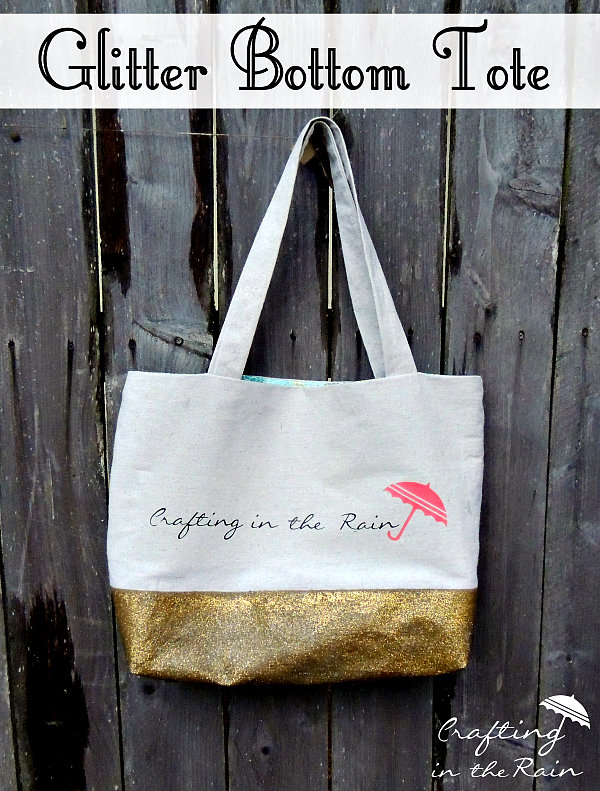
In case you find yourself needing a large tote with your blog name on it, or just want a big bag for carrying around whatever it is that we like to put in big bags…or really, the main question…you want to know how to glitter it without making a huge mess (a little mess, but not a huge one) then read on. Also, I don’t have a ton of pictures because I was in more of a “get it done” mode than “create a tutorial” mode.
I used:
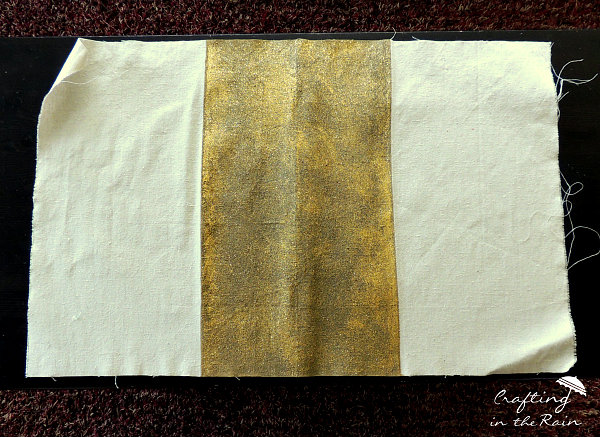
canvas drop cloth 22 inches x 34 inches — for outer bag
regular fabric 2 pieces of 22 x 18 inches — for lining
canvas 4 x 34 inches — for handles
RustOleum mettalic gold spray paint
gold glitter
Mod Podge (matte and Outdoor)
spray lacquer
Start by taping off a 13 inch strip down the middle of the canvas piece. When folded, this will be the bottom of the bag. Spray with gold spray paint, at least a couple of coats. Let dry.
Mix about 1 TBS glitter with 2 TBS Mod Podge and brush onto the gold painted portion of the fabric. Make more and continue if needed to cover the whole area. Let dry.
Brush on a coat of plain Mod Podge and let dry again.
Using 1 inch seam allowance, sew down the 18 inch sides of the lining (right sides together), and also a few inches from each side on the bottom, but leave about 7 inches open.
Sew (right sides together) up the sides of the canvas.
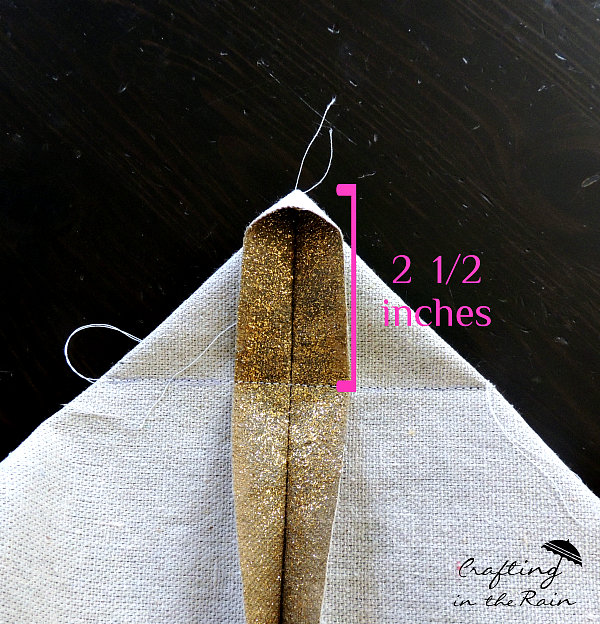
Make box corners in the canvas and the lining, measuring 2 1/2 inches from the corner.
Trim corners and turn right side out. DO NOT use your good fabric scissors when cutting the canvas! The glitter on there will ruin them. Use some junky paper scissors…they will get the job done and your fabric scissors will be spared 🙂
Make straps by sewing 1/2 inch seam making a long tube. Turn inside out, iron and cut in half so you have 2 straps. Pin to the right side of the canvas portion, about 5 inches from each side seam of the bag.
Pin right sides of the bag lining around the edges of the canvas. Sew all the way around, 1 inch seam, reinforcing at the straps.
Pull the bag through the opening left in the lining, fold seam in and sew closed. Iron around the top edge of the whole bag and the sewing is done!
Through the sewing, I did find a few pieces of glitter had ended up on my hands and the table, so here’s how I finished sealing it.
Take the bag outside and spray on 2-3 coats of the spray lacquer just on the bottom/ glittered part of the bag. No need to tape off the rest of the bag, just do your best to spray only the bottom. I found that this helped to give some more structure to the bag bottom also.
When that is all dried, brush on 2 coats of Outdoor Mod Podge and let dry. This will keep any raindrops from showing cloudy spots on your bag.
 |
| Source |
Finally, I used heat transfer vinyl to cut out my blog name and cute little umbrella and ironed it onto the front of the bag. Now if someone asks who I am, and I’ve just stuffed part of my lunch in my mouth, I can just point to my bag.
I’ll have to let you know how this holds up at the conference (and if all my friends there end up hating me because they get gold glitter on them and they have no idea how 🙂 But when I run my hands over it now, not a single thing comes off.
And if you see me at SNAP, you must come say hi 🙂
See this post for over 30 more things to make with drop cloth.
Love this idea, but don’t have a way to cut our your vinyl? You need a machine!!
This Cricut bundle is a perfect way to get started!
 |
| affiliate |