Do you even look at your to-do list and just wish you were in Disneyland instead? I’m sure it’s not just me! Well, today I’m showing you how layer glitter vinyl. to make this Minnie bag.
I’m an affiliate with Get Away Today. Check their current Disney and Southern California vacation packages.

Just for fun, I added “I’d rather be” (you know for all those times you’d rather be somewhere Disney 🙂 at the top, but you can leave that off if you want.

So here’s what you need to get started:
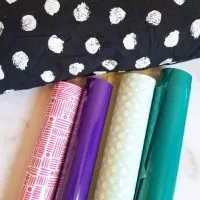
Black glitter heat transfer vinyl
Pink glitter heat transfer vinyl
Yellow (or other color) heat transfer vinyl
Blank bag
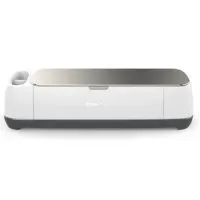
Cricut
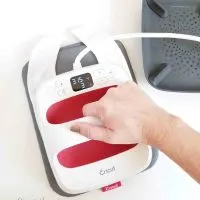
Iron or Cricut Easy Press
Prepare to Layer Glitter Vinyl
Make your pattern in Cricut Design Space by making one large circle and adding two smaller ones for ears, then weld all three together. Then find a bow shape and place it between the ears.
Cut using the dial set to “custom” and select “iron on, glitter” from the drop down menu on the screen.

(UPDATE: Note, this post was created using my Cricut Explore machine. If you are using a Cricut Maker machine, which has no dial, you will simply select “glitter iron on” from the materials list.)
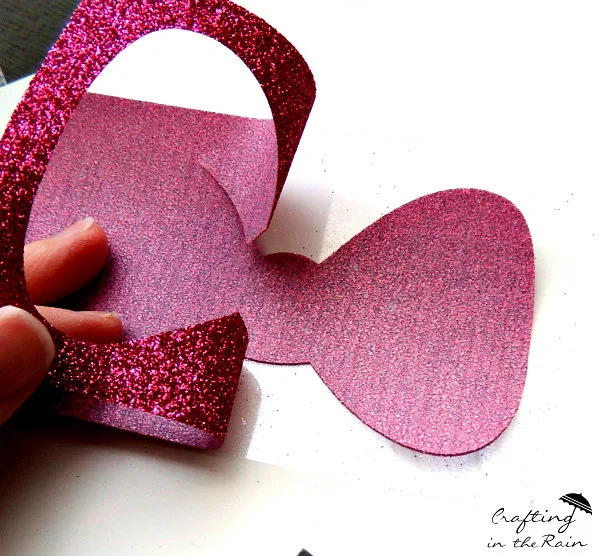
Now we do something a little tricky to make the glitter vinyl work. You can’t actually layer glitter vinyl – if you try to put other iron-on vinyl on top it won’t stay well. So we have to make a cut out of the bow shape.
Do this in Design Space by selecting both the Minnie head and bow and clicking “slice.” You can now pull apart the bow and the main part of the head. The small extra piece can be deleted.
Learn more about Slice, Attach, and Weld in this post.
Send the project to cut, remembering to MIRROR the images for cutting out iron on vinyl. Peel the extra vinyl away and we’re ready to iron.

Ironing Glitter Vinyl
Place words on your bag and press down on all areas, especially edges, with a hot iron. Pull up the plastic sheet put down the black glitter and iron down. Then position the pink bow to line up exactly with the cut-out.
Place the plastic sheet from the black vinyl back down so the black is completely covered and protected and iron down the pink. Now it looks like you were able to layer glitter vinyl.

Layer Glitter Iron-On

Glitter iron-on doesn't let other layers stick very well on top, so learn how to use this cutout technique to get the layered look.
Materials
- Glitter Iron-on Vinyl
- Tote bag
Tools
- Weeding tools
- EasyPress
- EasyPress mat
Instructions
- Identify the parts of your glitter design that you want to look layered
- Overlap them in Design Space and "slice" to create cut lines for each part
- Delete unneeded pieces
- Cut iron-on (remember to mirror!)
- Weed and then iron onto the bag, fitting the vinyl together like a puzzle for each pressing
Notes
Using this slice technique for glitter iron-on is most important for items that will be laundered. A more decorative piece probably won't put so much strain on the places where one layer of iron-on is adhered to glitter instead of fabric underneath.
Recommended Products
As an Amazon Associate and member of other affiliate programs, I earn from qualifying purchases.


Don’t you just love it? Be sure to visit R&R Workshop all month to see all the new Disney craft ideas.

See this post for more instructions on how to Slice in Design Space


Or watch this video:
For more bag decorating ideas, see these posts
My weekend is all booked
Block printed pumpkin bag
Add vinyl to makeup bags
Skyler
Thursday 21st of May 2020
I was actually able to create several shirts where I just heat pressed glitter vinyl on top of each other without having to do the extra work of slicing. You just have to press your base glitter layer first with just enough heat and pressure to get it to peel, then lay the next layer on top and continue on. I've done this with up to 3 layers of glitter HTV and had no problems after several wash/wears.
Lisette Ruiz
Wednesday 23rd of March 2016
Thanks for sharing, I wish there was a photo of how you did the bow after (protecting the black), did you just use the original plastic sheet that was on it without peeling it off?
Rachel Rutt
Monday 8th of June 2015
Super cute!! Thank you for sharing your Glitter Vinyl Disney bag in the Month of Disney Series :)
Danice
Tuesday 2nd of June 2015
Well how adorable! I will be attempting to create on of these. Thank you for this link-up :)